Whether you’re using Google Analytics, Analytics software built into WordPress Jetpack, or even a custom built solution, I think we can all agree that analytics tracking is of utmost importance for successfully managing a website. Today we dive into the world of measuring your website’s performance.
What is Analytics Tracking?
Analytics tracking is just a fancy word for measuring your website traffic. It’s actually a bit more complex than that, but we’ll get into that shortly. The information that you get will vary from one solution to another, but all of them should in some way feature a clean representation of your website’s traffic, based on days, weeks, months, years, etc.
What solutions are there?
For the most part, we tend to recommend Google Analytics. The interface can be embedded into your website and the data can be exported to other Google tools, like Google Adwords, Google Adsense, etc.
That being said, there are other options. If you’re using WordPress (which we strongly recommend you do), you can take advantage of the Jetpack plugin. We don’t particularly encourage the use of it, since the modules that it offers are pretty basic and Jetpack by itself does tend to slow websites down by a fair bit. If however, you’re DYI-ing your website and aren’t all that computer savvy, I would recommend it, since it’s by far the simplest solution out there.
Most website studios worth a damn will however just include analytics in every project that they work on, since it’s one of the most integral parts of maintaining and marketing a website.
What makes analytics so important?
Well, we already know that content is king for generating free, organic traffic to your website… which is awesome. But you do need to know how many visitors you got by writing that awesome blog post, where you’re sources are coming from to figure out what time you should post at (taking time zones into consideration).
We can also use analytics to keep track of backlinks, bounce-rates, click-rates, etc. Having vital pieces of information when managing a website will allow you to make smarter decisions and optimize how your website functions.
Setting up analytics tracking with WordPress Jetpack
Setting up Analytics tracking with WordPress Jetpack is as simple as it gets. Here are a few steps to follow:
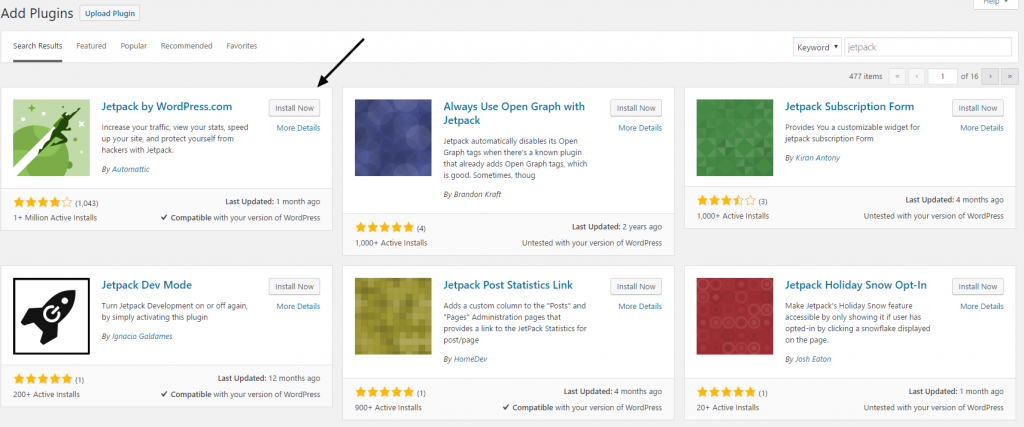
- Install Jetpack by going to Plugins->Add New.
- Search for Jetpack.
- Click “Install Now” and then “Activate”.
- Follow on screen instructions.
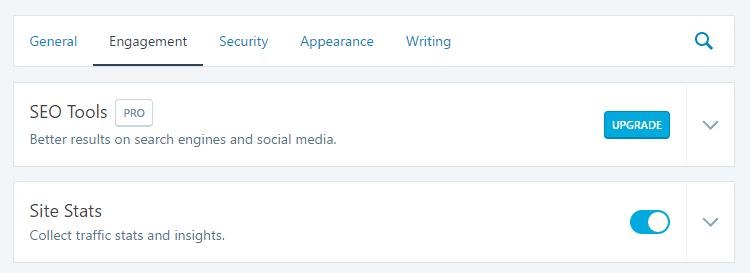
Note: The analytics module can be found by visiting Jetpack -> Settings -> Engagement.
Conclusion
You may be wondering why we haven’t included a guide on how to set-up Google Analytics for your website. There’s a good reason for that. Google analytics is a bit more advanced than the integrated analytics tracking module of Jetpack. There are a lot of variables when setting up your Google Analytics account and I’d recommend having a professional set it up in your stead.
Regardless of which service you choose as your analytics tracking platform of choice, you’re definitely going to have a much clearer image of how your website is performing.